
Written by Aaisha Naaz, B.Sc. Biotech, M.Sc. Chemistry
Table of Contents
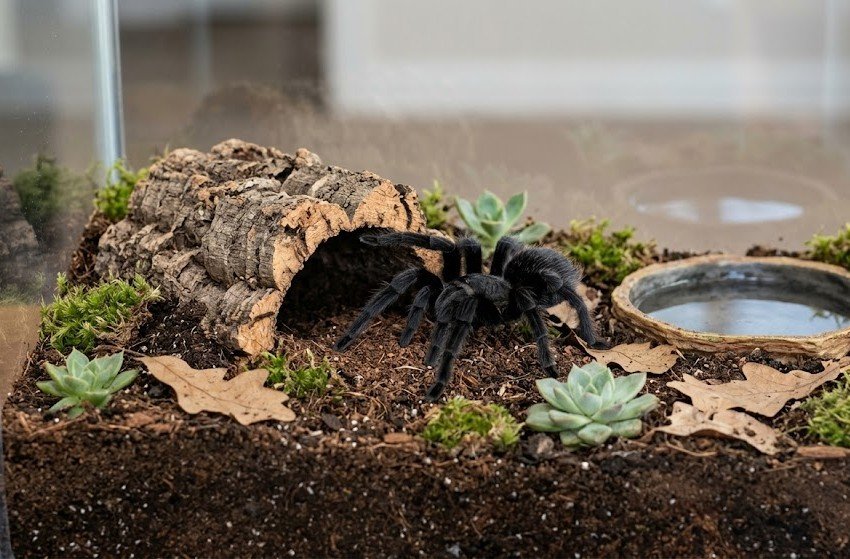
If you are about to lean how to rehouse a tarantula, feeling overwhelmed is normal. Rehousing may seem straightforward, but it’s not. Umpteen things can go wrong during rehousing; your spider might sprint up the enclosure wall, disappear behind a cork hide, or stand its ground with its front legs raised.
If anything like that happens, the solution isn’t to move faster. It’s to prepare better. Knowing how to rehouse a tarantula well is the difference between a calm transfer and an escape.
Whether you’re moving a terrestrial Grammostola pulchra, a burrowing Ceratogyrus darlingi, or a fast arboreal Psalmopoeus irminia, the goal is the same: move the spider without injuring it, losing control, or turning a routine enclosure change into an escape attempt.
This guide covers how to rehouse a tarantula, when to rehouse it, what tools you need, a step-by-step transfer method, species-specific considerations, and mistakes to avoid.
If you’re still setting up your first enclosure, read tarantula enclosure setup guide first.
3 Reasons to Rehouse Your Tarantula
Rehousing your tarantula isn’t just about making things look beautiful. There are three reasons why you should consider rehousing your spider:
- Health
Old substrate can grow mold or harbor mites, and a damp, stale enclosure can cause problems over time. Clean conditions protect your spider.
- Growth
A spider that has outgrown its enclosure can’t turn around comfortably, move around its hide, or build a proper retreat.
- Safety
Broken latches, large gaps, or a fall height that’s too high for a terrestrial species all put your spider at risk.
Rehousing is a tool for those problems. You don’t need to repeat it on a schedule.
When to Rehouse a Tarantula
The most common rehousing mistake is moving a spider that doesn’t need it yet. Rehousing makes sense when:
- The spider has outgrown its enclosure and can’t turn around or use its hide comfortably.
- The enclosure is unsafe, for example, with broken latches, gaps, or a fall height too high for a terrestrial species.
- The substrate is contaminated, persistently moldy, or waterlogged.
- There’s an urgent hazard, such as flooding or a damaged enclosure, where waiting is more dangerous.
Avoid rehousing to improve the enclosure’s appearance. Unnecessary disturbance adds risk without providing any benefit.
4 Things To Keep Ready Before Rehousing
Have everything within reach before you open the old enclosure. You don’t want to be searching a drawer with a spider loose in the room. So, keep these four tarantula rehousing tools ready:
- A clear catch cup, large enough that the spider can stand normally inside
- A stiff card or thin plastic sheet to seal the cup
- A soft, long-handled paintbrush
- Long feeding tongs, used only for decor and water dishes
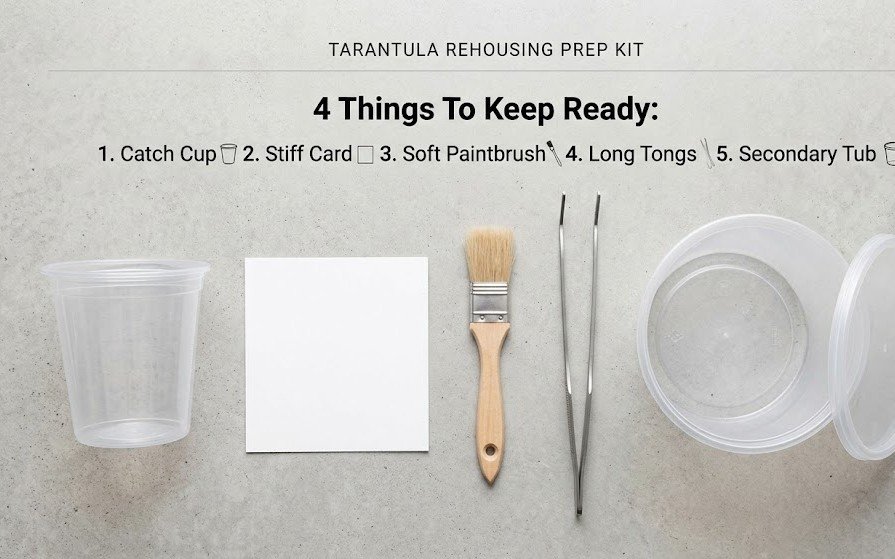
Set up a secondary containment area
A secondary containment tub, or a clean, dry bathtub with the drain plugged
The bathtub is a backup, not a guarantee. Spiders can climb textured surfaces, and a fall onto hard ground can cause serious injury. If you have one, a smooth-sided tub is the better choice.
Lock the room down before you start. Close doors and windows, and keep other pets out.
How To Rehouse A Tarantula Safely: 6 Easy Steps
Rehousing doesn’t have to be stressful. Follow these six easy steps in order, and you’ll have your safe tarantula transfer into their new home:
Step 1: Prepare the New Enclosure First
Set the new enclosure up completely before the spider leaves its old home. Check that:
- The substrate suits the species and is packed firmly enough to hold a burrow if the spider digs.
- Limit the fall height, especially for heavy-bodied terrestrial species.
- The hide is stable and sized for the spider.
- Keep the water dish clean, shallow, and within reach.
- Secure the decor so it can’t topple or trap the spider.
- Make sure the lid or door closes and locks properly.
Test the closure before you begin. Know exactly how you’ll secure the enclosure once the spider is inside.
Step 2: Assess the spider before opening its enclosure
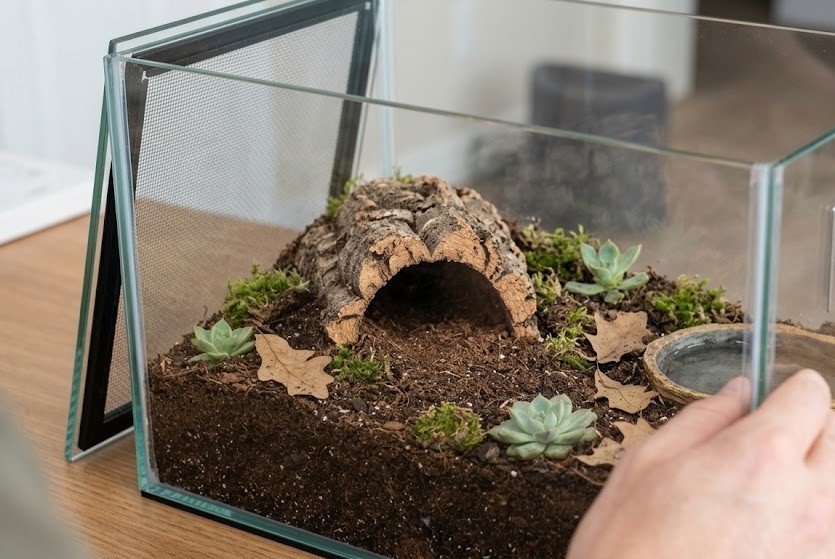
Observe its position, molt status, and behavior. Also check if it is sitting in the open, webbed into a retreat, tucked beneath a hide, or deep inside a burrow. Check whether it shows defensive behavior or is a fast-moving Old World species.
Knowing these details can make the rehousing process safe and smooth.
- If the tarantula is defensive, highly mobile, hard to access, or unfamiliar to you, a standard catch-cup technique might not be enough. You may need an experienced keeper, especially for a fast or medically significant species.
- Check its molt status. A spider approaching a molt may stop eating, become less active, or seal itself into its retreat. If you suspect a pre-molt, wait to rehouse it.
A freshly molted spider is also vulnerable because its new exoskeleton and fangs need time to harden. If the move isn’t urgent, wait several days to a couple of weeks, depending on the spider’s size and species, and check that the fangs have darkened before you disturb it.
Step 3: Carefully remove loose furnishings
- Open the tarantula enclosure slowly, avoiding sudden movements and unnecessary vibration. Then remove loose items that aren’t supporting or trapping the spider.
- Use tongs to lift water dishes, loose decor, or removable furnishings.
- Avoid pulling away a hide or tearing apart a burrow if the spider is underneath it. You could injure the animal or provoke a sudden escape response.
- If the spider has built a substantial retreat, take time to assess how to access it safely. Don’t dismantle the enclosure aggressively to speed up the transfer.
Step 4: Use a catch cup and transfer card
For a tarantula sitting in an accessible, open area, the catch cup method is the simplest low-contact answer of how to rehouse a tarantula.
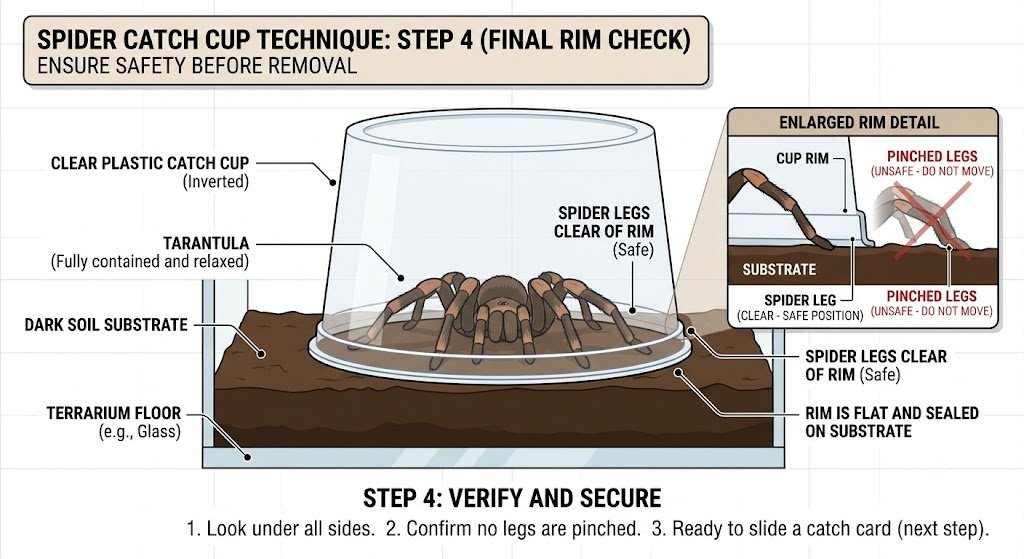
- Slowly position the clear cup over the spider, without striking its legs.
- Check the rim carefully to ensure no legs are caught beneath it.
- If the spider doesn’t move, gently use a soft paintbrush to encourage it to move to a safe position. Avoid repeatedly prodding the spider.
- Once the spider is fully inside, slowly and evenly slide the transfer card beneath the cup.
- Keep the card flush against the cup’s opening, then secure the cup with its lid if appropriate.
Do not lift the cup while a leg remains beneath the rim. If the spider bolts or adopts a defensive posture, stop and reassess rather than chasing it around the enclosure.
Step 5: Transfer the tarantula to its new home
Now that you have the spider in the cup, move it to its new home.
- Move the secured catch cup into the prepared enclosure.
- Position it close to the substrate to keep the spider near the ground. Keep the cup stable and avoid dropping or tipping it.
- Carefully open the cup and let the tarantula move out when it feels safe; if it remains inside, give it time. You can use a gentle brush cue if needed, but don’t force the spider out by shaking the cup or pushing its body.
- Once the spider is inside the enclosure, secure its lid or door immediately.
- Check the closure, ventilation gaps, and access points before leaving the area.
For a terrestrial tarantula, keep the transfer low to the substrate.
For an arboreal species, make sure the opening cannot direct it toward your hands or an escape route, since they climb well.
Step 6: Let the tarantula settle
The last step in learning how to rehouse a tarantula is letting the spider settle. It might take some time, so don’t rush.
After rehousing, your tarantula may explore, stay still, investigate its retreat, or start laying silk. So avoid rearranging the enclosure or encouraging the spider to come out of its hide.
For juveniles and adults, make the water dish accessible, and keep enclosure conditions appropriate for the species.
Resume feeding according to the spider’s normal routine and molt status. Avoid offering food immediately after rehousing.
Rehousing Different Types of Tarantulas
Not all tarantulas rehouse the same way. The basic principles remain the same, but the safest transfer method depends on the spider’s lifestyle and behavior. The safest way to learn how to rehouse a tarantula is to match the method to the species. Let’s see how to rehouse tarantulas of different species:
New World terrestrial species, like many Brachypelma and Grammostola, are generally slower and more predictable. Their main risks are urticating hairs, which can irritate skin, and falls from height.
So, keep your face away from the enclosure, and don’t rub your skin or eyes after touching anything near the spider. If hairs reach your eyes or you have trouble breathing, seek medical help immediately.
Old World species, such as Pterinochilus and Poecilotheria, can be much faster and don’t always give warning before bolting. Some species’
bites can be medically significant. For these, use a larger containment zone and consider asking an experienced keeper for help.
Fossorial species, like many Ceratogyrus, may retreat deep into a silk-lined burrow. Therefore, avoid digging with tongs or skewers, as it can injure the spider or collapse its tunnel. Moving these spiders is very risky, so ask an experienced keeper first.
Arboreal species, like Avicularia and Psalmopoeus, climb quickly when startled. So, have the new enclosure’s lid ready to close, and don’t reach up to grab a climbing spider.
If the spider is in a removable cork hide, move the hide intact. Just be careful not to crush the spider or compromise the enclosure’s safety.
6 Things To Avoid While Rehousing A Tarantula
- Rehousing during pre-molt or right after a molt, unless there’s an urgent hazard.
- Grabbing or pinning the spider with tongs. Use them only for decor and water dishes.
- Chasing a bolting spider with brushes or your hands.
- Using a tall enclosure for a terrestrial species. A longer fall can rupture the abdomen, so taller isn’t always better.
- Rushing because you’re nervous. Take a breath, slow down, and pause when the transfer becomes unpredictable.
- Disturbing the new enclosure too soon. Let the spider settle before you check on it again.
Post-Transfer Checklist
Once the spider is in its new home, work through these steps:
- Secure the lid right away, then check the closure, ventilation gaps, and any access points before you leave the room.
- Check that the hide and substrate are positioned properly.
- Put the enclosure somewhere stable, away from direct sun, vents, and vibration.
- Leave the spider undisturbed for at least two to three days. A nervous or defensive spider may need up to a week.
- Avoid feeding for a few days after the move, especially slings or recently molted spiders.
- Monitor for signs of stress or injury over the next week. Watch for a fall, an inability to stand normally, dragged legs, fluid leakage, or a prolonged tight curl.
If you notice any of these signs, seek advice from an experienced exotic-animal veterinarian promptly.
When a tarantula moves into its new enclosure, it needs time to settle in. It will explore, spin a web, and come to accept the new space as home. Let it do that without interruptions.
What to do if Something Goes Wrong
A few things can go wrong when you transfer your tarantula, no matter how many precautions you take. In that case, you should know how to handle it. For example;
- If the tarantula escapes the cup or bolts
Keep a close eye on your spider, block off other exits, and wait for it to stop before approaching again.
- It climbs the wall
Don’t try to pull it off. Give it space and make sure it can’t reach an uncontrolled area.
- It kicks hairs
In such a case, avoid touching your eyes or face, wash your hands, and follow first-aid advice. If you notice breathing difficulty or eye exposure, you need urgent medical attention.
- It falls
Don’t handle it further. Check for visible injury from a distance, and seek veterinary advice if there are any signs of trouble.
- It escapes the room
Close doors, keep children and pets away, and don’t make sudden grabs.
Frequently Asked Questions
- How often should I rehouse my tarantula?
You don’t need a fixed rehousing schedule. Rehouse it only when the enclosure becomes unsuitable, or the spider outgrows it.
- Can I rehouse using my hand?
Avoid using your hand because direct handling isn’t recommended. A catch cup and card give you more control and less contact with the spider.
- Should I feed before rehousing?
Avoid feeding right before a move. Remove uneaten prey first, especially if the spider may be preparing to molt.
- How long should I wait to feed after rehousing?
There’s no universal rule. Let the spider settle, then follow its normal feeding pattern and molt status.
- Can a tarantula die from a fall during rehousing?
Yes, a fall can be fatal because it can cause serious abdominal injuries.
6. How to rehouse a tarantula safely?
Knowing how to rehouse a tarantula safely starts with preparing the new enclosure first, then using a catch cup and transfer card.
Conclusion
Learning how to rehouse a tarantula rehousing isn’t a test of your bravery. It tests your preparation, patience, and your ability to know when not to push your luck.
Prepare the new enclosure first, choose a transfer method that suits the species, keep the spider close to a safe surface, and use a catch cup instead of your hands. If the tarantula’s behavior or the enclosure layout makes the move difficult to control, pause and get help.
Knowing how to rehouse a tarantula safely is not to finish the rehouse as quickly as possible. It is to finish with the spider safely in its new enclosure and everyone else uninjured.
Happy rehousing!